Monday, September 17, 2012

Crackerbox quilt finish!

I have been trying to get this quilt finished for the last week but have been lacking in focus and motivation lately. Finally this morning I put in the last hand-stitches into the back of  the binding whilst enjoying a spot in  the morning sun. Then while the sun was still hanging around I took it out into our garden for a photo shoot before the rain in the surrounding hills arrived. 

Crackerbox quilt 
The pattern is called 'Crackerbox' and is quite simple to piece together as it's just made up of 1/2 square triangles (large ones) and fabric strips. I picked out some pretty floral fabrics for the top that have been hiding in my fabric stash just a bit too long :-) It feels good to finally have them in a quilt top at last. 

Crackerbox quilt 

Crackerbox quilt 
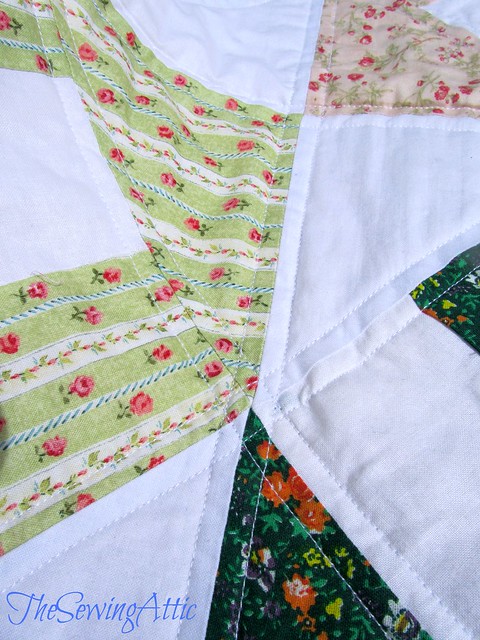
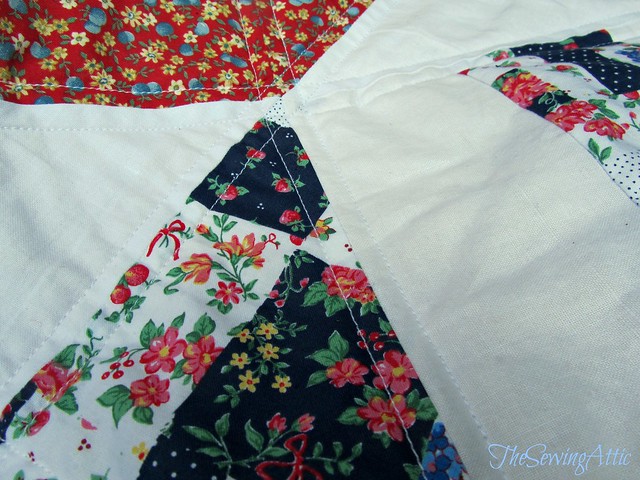
Some of the prints were bought back for me from Portugal when me eldest daughter was just a baby and one is a vintage fabric passed onto me from my Aunty who was a pretty good seamstress in her day.

Crackerbox quilt 
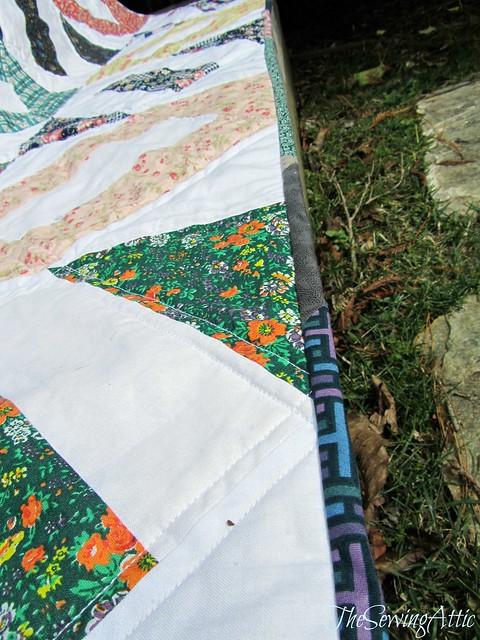
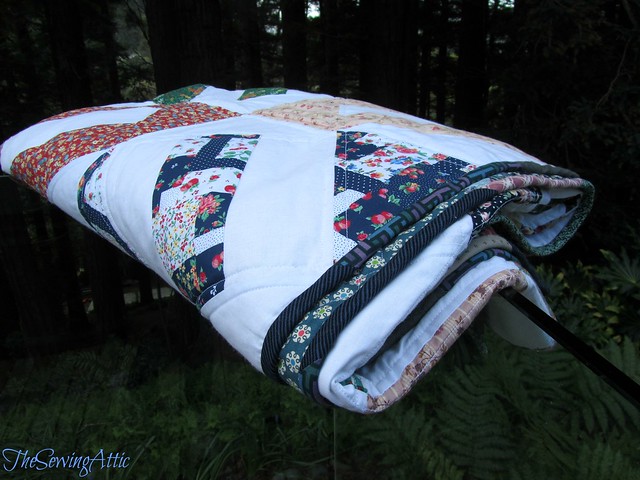
For the binding I used up yet more fabrics from my stash to make up a scrappy looking binding which I think suits the scrappy look of this quilt. It is simply quilted in straight lines following the seams of the pattern.

Crackerbox quilt - improv back 
And yes the back of course is made up of leftover fabrics from the front along with a "Denyse Schmidt" print purchased on sale at Spotlight. 

Crackerbox quilt 
It does feel good to have this quilt finished and to now be able to start a new sewing project or two.
So many ideas swimming around my head now but which one to focus on.........

My photography assistant
And here is my photography assistant that kept me company around the garden today. By that indignant look on her face I don't think she enjoys having the camera pointed her way though ;-)

This quilt will be added to my Etsy and Felt shops tomorrow :-)

Monday, September 3, 2012

Dining table reveal....

 I have spent a good part of the last couple of months sanding back my dining table ready for a fresh, new, slightly more modern look. I nearly forgot to take a before photo, but remembered part way through the sanding process. The main reason it took so long was the weather, which has been just a tad wet here lately. As I didn't want to sand inside I had to wait for fine days to drag it outside onto our deck to work on it plus it is too heavy to lift on my own so I had to have someone around to help out. It's a very heavy solid table!! I have had this table for over 20 years as it was purchased with our first home and the elderly owner was getting rid of everything and at that stage we had nothing.
 
 So here it is with a fresh coat of paint and clear polyurethane, looking much more fresh and modern don't you think :-) I know my parents will not like the pedestal painted white but I really love this look and had found inspiration for this look on Pinterest here and here. I like this look too but wasn't quite brave enough to do it :-)
I was originally going to go for a 'white wash' look but it just wasn't looking right with the dark mahogany wood underneath so I ended up with this solid white with a couple of coats of clear polyurethane to give it some sheen. I think painting it white has made it's lovely decorative features stand out.

 I had also thought about painting the whole thing white but once I sanded it back to reveal it's beautiful wood grain I just could not cover it up and decided to simply give it a coat or 3 of clear polyurethane.
I am now waiting for the rain to stop long enough to go outside to pick some pretty spring flowers to fill this collection of vases I put on the table this morning. Think I might have to retreat to my sewing attic for some sewing in the meantime though, it's looking pretty wild outside at the moment.

Monday mosaic....

Some pretty photos to inspire you at the start of the week...........Enjoy :-)
inspiration mosaic 3/9
Related Posts Plugin for WordPress, Blogger...